Article Content
Introduction
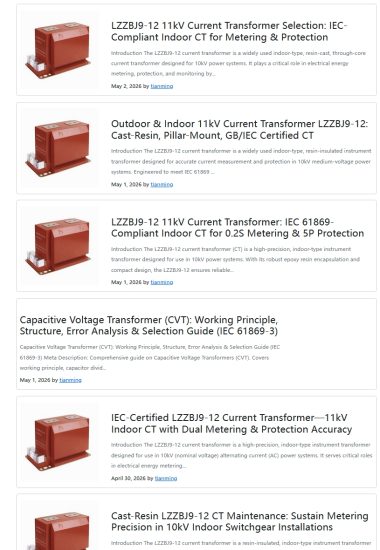
The LZZBJ9-12 current transformer is a high-precision, indoor-type instrument transformer designed for use in 10kV (nominal voltage) alternating current (AC) power systems. It serves critical roles in electrical energy metering, protective relaying, and system monitoring by accurately transforming high primary currents into standardized, lower secondary currents suitable for connected instrumentation and protection devices. This device conforms to IEC 61869 standards and features a resin-cast, non-flammable epoxy insulation system that ensures reliability, safety, and long service life under normal operating conditions. The “LZZBJ9-12” designation indicates its structural type: “L” for current transformer, “Z” for post-type installation, “Z” for resin-cast insulation, “B” for protection class capability, “J” for enhanced accuracy, and “12” for the highest system voltage of 12kV (compatible with 10kV networks). Proper installation is essential not only for operational accuracy but also for personnel and equipment safety. Incorrect mounting, inadequate clearances, or improper wiring can lead to measurement errors, insulation failure, or hazardous arc-flash incidents. This document outlines the first half of the installation requirements, covering foundational considerations prior to physical mounting and electrical connection. Adherence to these guidelines ensures compliance with national and international electrical codes, manufacturer specifications, and utility best practices.
Pre-Installation Requirements
Before any physical handling or mounting of the LZZBJ9-12 current transformer, a comprehensive pre-installation assessment must be conducted to verify compatibility, environmental suitability, and safety readiness. This phase is critical to prevent damage during installation and ensure long-term performance.
First, confirm that the transformer’s rated parameters match the system requirements. The LZZBJ9-12 is rated for a system voltage of 12kV (maximum), nominal frequency of 50/60 Hz, and standard primary current ratings such as 50A, 100A, 200A, up to 3000A. Secondary current is typically 5A or 1A. Verify that the selected ratio aligns with the connected metering or protection devices. Additionally, check the accuracy class—common options include 0.2, 0.5 for metering and 5P10, 10P10 for protection—and ensure it satisfies the application’s precision needs.
Inspect the transformer upon delivery for any signs of mechanical damage, cracks in the resin casing, or contamination. Store the unit in a dry, clean, and temperature-controlled environment (ideally between -25°C and +40°C) until installation. Avoid exposure to moisture, dust, or corrosive atmospheres. Prior to installation, perform an insulation resistance test using a 2500V megohmmeter between primary and secondary windings, and between windings and ground. Acceptable values should exceed 1000 MΩ at 20°C; lower readings may indicate moisture ingress or insulation degradation.
Ensure all necessary tools, personal protective equipment (PPE), and lifting aids are available. Confirm that the switchgear or busbar structure where the CT will be mounted is de-energized, grounded, and tagged out per lockout/tagout (LOTO) procedures. Review the single-line diagram and CT wiring schematics to avoid miswiring. Finally, verify that ambient conditions at the installation site meet specifications: relative humidity ≤85% (non-condensing), altitude ≤1000 m above sea level (derating required above this), and absence of explosive or conductive pollutants.
| Parameter | Requirement | Verification Method |
|---|---|---|
| System Voltage | ≤12 kV (for 10 kV networks) | Review system design documents |
| Primary Current Rating | As per load profile (e.g., 400/5A) | Check nameplate and engineering specs |
| Insulation Resistance | ≥1000 MΩ @ 20°C | Megger test (2500V DC) |
| Ambient Temperature | -25°C to +40°C | On-site measurement |
| Relative Humidity | ≤85%, non-condensing | Hygrometer reading |
Mechanical Installation Requirements
The mechanical installation of the LZZBJ9-12 current transformer must ensure secure mounting, adequate clearances, and structural integrity to withstand electromagnetic forces during fault conditions. This CT is designed for post-type (vertical or horizontal) mounting within metal-enclosed switchgear or on insulated support structures.
The transformer features a flange base with standardized bolt holes (typically M10 or M12, spaced according to IEC 61869-2). Mounting surfaces must be flat, rigid, and capable of supporting the unit’s weight (approximately 15–25 kg depending on rating) without deflection. Use stainless steel or galvanized bolts, washers, and nuts of appropriate grade (e.g., Grade 8.8) to prevent corrosion and ensure clamping force. Torque values must comply with manufacturer recommendations—usually 25–35 N·m for M12 bolts—to avoid cracking the epoxy housing due to over-tightening or loosening under vibration.
Critical clearance distances must be maintained to prevent flashover and ensure dielectric strength. For 10kV systems, the minimum phase-to-phase and phase-to-ground air clearance should be at least 125 mm. Creepage distance along the surface of the resin insulation must meet pollution degree 2 or 3 requirements (typically ≥20 mm/kV, so ≥240 mm for 12kV). Ensure no sharp edges, burrs, or conductive debris are present near the CT, as these can distort the electric field and initiate partial discharges.
The orientation of the CT must follow the arrow marking on the housing, which indicates the direction of primary current flow (from P1 to P2). Incorrect orientation reverses the secondary polarity, leading to erroneous metering or relay maloperation. When installing multiple CTs on a three-phase system, maintain consistent orientation across all phases. Additionally, avoid subjecting the CT to mechanical stress from busbars—use flexible connectors or allow for thermal expansion if rigid busbars are used. Vibration isolation may be necessary in high-vibration environments (e.g., near large motors or transformers).
Finally, ensure the installation location allows for future access to secondary terminals for testing, maintenance, or replacement. Do not obstruct terminal boxes with cables, brackets, or other components. All mounting hardware should be electrically bonded to the equipment grounding system to prevent floating potentials.
| Aspect | Specification | Notes |
|---|---|---|
| Mounting Type | Flange-mounted (post-type) | Vertical or horizontal orientation permitted |
| Bolt Size | M10 or M12 (as per model) | Use anti-corrosion hardware |
| Torque Value | 25–35 N·m (for M12) | Do not exceed max torque |
| Air Clearance (10kV) | ≥125 mm | Phase-to-phase and phase-to-ground |
| Creepage Distance | ≥240 mm | For 12kV, pollution degree 2 |
| Weight | 15–25 kg | Depends on current rating |
Primary Connections
Proper connection of the primary conductor through the LZZBJ9-12 current transformer is fundamental to accurate current transformation and system safety. The primary circuit carries the full load or fault current of the 10kV system and must be installed with strict attention to mechanical stability, electrical continuity, and thermal performance.
The LZZBJ9-12 is a window-type (or toroidal) CT, meaning the primary conductor passes directly through the central aperture rather than being internally wound. The conductor itself acts as the primary winding (1 turn). Therefore, the size, shape, and material of the primary busbar or cable must be compatible with the inner diameter of the CT window—typically ranging from 40 mm to 80 mm depending on the model. Solid copper or aluminum busbars are preferred; if using cables, ensure they are tightly bundled and centered within the window to minimize magnetic asymmetry, which can introduce ratio and phase errors.
All primary connections must be made with clean, smooth, and oxidation-free contact surfaces. Remove any paint, grease, or insulating coatings from the contact area. Use appropriate lugs or clamps rated for the system voltage and current. Bolted connections should be torqued to manufacturer or industry standards (e.g., 40–60 N·m for 400A copper busbars) and secured with lock washers or thread-locking compound to prevent loosening due to thermal cycling or electromagnetic forces. Never use the CT housing or flange as a current-carrying path—primary current must flow only through the designated conductor passing through the window.
Thermal management is critical. Ensure the primary conductor has sufficient cross-sectional area to handle continuous load current without exceeding 90°C at the connection point. Derate if multiple CTs are installed in close proximity or in enclosed compartments with poor ventilation. During short-circuit events, the primary conductor experiences significant electromagnetic repulsion forces; therefore, it must be firmly braced within 300–500 mm of the CT on both sides to prevent displacement or mechanical damage to the transformer.
Polarity must be observed: the end of the primary conductor entering the side marked “P1” (usually indicated by an arrow or label) defines the reference direction. On three-phase installations, all CTs must have P1 facing the same direction relative to the power source (e.g., toward the busbar or toward the load, consistently). Reversing P1/P2 on one phase will cause vector group errors in differential or directional protection schemes. After connection, visually inspect that no tools, metal shavings, or foreign objects remain inside the CT window or near primary terminals.
| Parameter | Requirement | Best Practice |
|---|---|---|
| Window Diameter | 40–80 mm (model-dependent) | Verify conductor fits with clearance |
| Conductor Material | Copper or aluminum | Avoid ferromagnetic materials |
| Connection Torque | Per lug/busbar spec (e.g., 50 N·m) | Use calibrated torque wrench |
| Polarity | P1 toward source (consistent across phases) | Match system single-line diagram |
| Bracing Distance | ≤500 mm from CT on both sides | Prevents movement during faults |
| Max Conductor Temp | ≤90°C at connection | Ensure adequate ampacity |
5. Secondary Wiring
Secondary wiring encompasses all low-voltage control, monitoring, and protection circuits associated with switchgear, transformers, relays, meters, and auxiliary devices. These circuits typically operate at 120 V AC/DC or lower and are critical for the safe and reliable operation of electrical power systems. Proper secondary wiring ensures accurate signal transmission, correct relay operation, and seamless integration with SCADA or other control systems.
Key considerations during secondary wiring include adherence to wiring standards (e.g., IEEE, IEC, NEC), segregation from primary conductors to prevent electromagnetic interference, use of shielded twisted-pair cables for analog signals, and proper grounding practices. All terminations must be secure, labeled clearly, and documented in accordance with as-built drawings. Wiring diagrams—such as schematic diagrams, wiring diagrams, and terminal block layouts—are essential references during installation and commissioning.
Common components involved in secondary wiring include current transformers (CTs), potential transformers (PTs), protective relays, control switches, indicator lamps, trip coils, and communication interfaces. Incorrect polarity in CT/PT wiring, for instance, can lead to false tripping or failure to detect faults. Therefore, meticulous verification is required before energization.
| Wiring Type | Voltage Level | Typical Applications | Cable Specifications |
|---|---|---|---|
| Control Wiring | 24–125 V DC/AC | Circuit breaker control, interlocks, alarms | 16–18 AWG, stranded copper, PVC-insulated |
| Instrumentation Wiring | 0–10 V / 4–20 mA | Meters, transducers, PLC inputs | Shielded twisted pair, 20–22 AWG |
| Relay & Protection Wiring | 48–125 V DC | Differential relays, overcurrent protection | 18 AWG, individually shielded pairs |
| Communication Wiring | Low voltage (RS-485, Ethernet) | SCADA, DNP3, Modbus interfaces | Category 5e/6 or fiber optic |
All secondary wiring must undergo continuity checks, insulation resistance testing (>1 MΩ), and polarity verification. Labels should follow a consistent naming convention (e.g., ANSI/IEEE device numbers) and be affixed at both ends of each conductor. Cable routing should avoid sharp bends, excessive tension, and proximity to high-current busbars to maintain signal integrity and long-term reliability.
6. Pre-Energization Testing
Pre-energization testing is a comprehensive set of verification procedures performed after mechanical and electrical installation but before applying system voltage. Its purpose is to confirm that all components are correctly installed, wired, and configured to operate safely under normal and fault conditions. This phase significantly reduces the risk of equipment damage, operational delays, or safety incidents during initial energization.
Testing activities include visual inspections, insulation resistance (megger) tests, continuity checks, relay settings verification, and functional simulations. Visual inspections verify bolt torque, grounding connections, cable dressing, and absence of foreign objects. Insulation resistance tests are conducted on busbars, cables, and windings using a 500 V or 1000 V DC megohmmeter; results must meet manufacturer or industry minimums (typically >100 MΩ for dry-type equipment).
Protective relays are tested using secondary injection: simulated currents and voltages are applied to validate pickup settings, time delays, and output contacts. Similarly, metering circuits are checked for accuracy and polarity. Control logic—such as breaker interlocks, auto-transfer schemes, and alarm sequences—is validated through manual simulation or automated test sets.
| Test Type | Equipment Tested | Acceptance Criteria | Tools Used |
|---|---|---|---|
| Insulation Resistance | Switchgear bus, cables, transformers | >100 MΩ (dry), >1 MΩ (minimum) | Megohmmeter (500–5000 V DC) |
| Continuity & Polarity | CT/PT circuits, control wiring | Correct polarity, no open circuits | Low-resistance ohmmeter, multimeter |
| Relay Functional Test | Protective relays | Operation within ±5% of setpoint | Relay test set (e.g., Omicron, Doble) |
| Control Sequence Test | Breaker logic, interlocks | Correct sequence per design | Manual switches, HMI simulation |
All test results must be recorded in commissioning reports and reviewed by the project engineer and client representative. Any discrepancies must be corrected and retested before proceeding. Pre-energization testing also includes verifying that all temporary grounds have been removed and that barriers, covers, and safety signage are properly installed.
7. Energization
Energization is the controlled process of applying system voltage to de-energized electrical equipment for the first time. It must be executed methodically under a formal switching schedule approved by the utility and site management. Only qualified personnel wearing appropriate PPE should be present during this high-risk activity.
The sequence typically begins with energizing the incoming utility supply to the main switchgear, followed by step-by-step energization of downstream sections (e.g., transformers, feeders, motor control centers). Voltage presence is verified at each stage using calibrated test instruments before proceeding. Inrush currents during transformer energization are monitored to ensure they do not cause nuisance tripping.
Initial energization is often performed with minimal or no load to observe system behavior. Key parameters such as phase rotation, voltage balance, and harmonic distortion are measured. Protective devices are observed for unintended operation. Once stable voltage is confirmed, loads are gradually added while monitoring for thermal performance and voltage drop.
| Step | Action | Verification Point |
|---|---|---|
| 1 | Isolate all outgoing feeders | Breakers open, tagged, locked out |
| 2 | Energize main incomer | Bus voltage = nominal ±5% |
| 3 | Energize transformer(s) | No abnormal noise, inrush < relay setting |
| 4 | Energize feeders incrementally | Load current balanced, no overheating |
A detailed energization log must be maintained, including timestamps, personnel present, readings, and any anomalies. If a fault occurs, the system must be de-energized immediately, and the root cause investigated before attempting re-energization.
8. Safety
Safety is paramount throughout secondary wiring, testing, and energization activities. All work must comply with OSHA regulations, NFPA 70E (Standard for Electrical Safety in the Workplace), and site-specific safety protocols. A Job Safety Analysis (JSA) or Risk Assessment must be completed before any task begins.
Personnel must wear arc-rated clothing, voltage-rated gloves, face shields, and insulated tools when working on or near exposed energized parts. During pre-energization, all circuits must be treated as live until proven otherwise using the “live-dead-live” verification method. Lockout/Tagout (LOTO) procedures must be strictly enforced to prevent accidental energization during maintenance or testing.
During energization, only essential personnel are allowed in the switchgear room. Emergency egress routes must be clear, and fire extinguishers rated for electrical fires (Class C) must be accessible. Communication protocols (e.g., two-way radios) ensure coordination between the control room and field teams. Additionally, grounding clusters and temporary protective grounds must be used when working on de-energized high-voltage equipment to guard against induced voltages or backfeed.
| Hazard | Risk Control Measure | Reference Standard |
|---|---|---|
| Arc flash | Perform arc flash study; wear PPE per incident energy level | NFPA 70E, IEEE 1584 |
| Electric shock | Verify de-energization; use insulated tools | OSHA 1910.333 |
| Unexpected energization | Implement LOTO; remove temporary grounds only after clearance | OSHA 1910.147 |
| Falls or slips | Keep floors dry; use non-slip mats in substations | OSHA General Duty Clause |
All personnel must be trained in emergency response, including CPR and first aid. Safety briefings must be conducted before each shift, and permits (e.g., hot work, confined space) obtained as needed. Continuous vigilance and a culture of safety are essential to prevent incidents during these critical commissioning phases.